Unity: Roadmap from Zero to Your First 2D Game and AR App in a Day
Sharing the best resources I found ramping up on Unity basics so it takes you a day instead of a week
If you know the basics of coding, but have never touched Unity, this post is for you.
(If you haven’t coded before or don’t know the basics of Object-Oriented programming, you’ll probably want to run through learncs.org or codeacademy before going through the rest of this.)
A couple of weeks ago, I knew nothing about Unity, game development, or augmented reality (AR).
I’m still no expert, but now I’m comfortable with the Unity Editor, Unity-specific terms, running an app on my phone, and the documentation makes a lot more sense.
To me, getting past the initial feeling of confusion and overwhelm is the first form of leveling up.
I’m going to condense my journey through tutorials and docs to a ramp-up plan you could get through in less than a day.
That way you can save yourself the time I spent going through the “fluff” tutorials that don’t really get you anywhere.
General Tips
Remember, we don’t want to learn just to learn. We want to learn toward a goal.
So most of your learning should be towards a specific outcome you can show. It might not seem like it at first, but running through tutorials without building anything will actually slow you down.
So we’ll be learning towards outcomes here.
Also, I usually like to start with the official documentation of any new project. No one has more to gain from you understanding the product than the company that made it!
But in this case, Unity’s documentation is actually pretty confusing at first. Great reference later on. Bad place to start.
Here’s a better plan.
Unity: Level Zero to One
The first thing you’ll notice when you try to learn Unity is that there’s a Unity Learn site with a bunch of different tutorials.
This seems perfect, right? Unity lessons by the Unity team! The only problem is that they’re painfully slow.
Like if you start the Unity Essentials course, there’s a whole module called “start learning” where you just watch videos of Unity users talking about why you should learn Unity and mindsets and stuff. That module alone can take up to 35 minutes.
If you’re like me and have to deal with other things like a full-time job, kids, school, etc…you don’t have time to watch random videos!
I’ve found some Unity Learn tutorials that actually get to the point, but most are filled with fluff and things that could be taught in a fraction of the time, especially at the beginning. Others actually have outdated content.
So here’s my attempt at saving you some time there.
Download Unity
Here’s what I’d do if I were starting over. No fluff:
Download Unity Hub.
Huh? What’s Unity Hub and why aren’t I just downloading Unity?
Great question and one I asked too. Unity Hub is where you can download and access different Unity installations (you might want an older version for certain projects or a newer version). It’s also where you can find links to different Unity resources, create a new project, and access existing projects.Open Unity Hub → go to `Installs` → click the `Install Editor` button → download the latest LTS (long term support) version of the Unity Editor.
The Unity Editor is what I originally thought “Unity” was. It’s where you can make your 2D or 3D experiences.
When I say “Unity” in this post, I generally mean the Unity Editor.
Get Comfortable With Unity
The first thing I’d recommend is to do one of the Unity microgames.
Microgrames are little tutorials in the Unity Editor that teach you the very basics while playing and improving on some fun games.
Here’s how to start:
Open the Unity Hub → go to `Projects` → click the `New Project` button → click `Learning` on the left navbar → choose a microgame.
I personally did the LEGO and FPS ones to see how they compared, and I’d recommend doing the FPS one.
The LEGO one had some parts that were very LEGO-specific and it was a little confusing in some places. Feel free to do as many as you want though.
At this point, you don’t know a ton about building an app from scratch, but the editor isn’t as foreign to you. Don’t worry if the editor is still confusing, it’s mostly about feeling more comfortable exploring.
The next thing I’d recommend is running through this tutorial (45 min) to build your first 2D game.
I watched a lot of videos, went through some Unity Learn courses, and went through Unity documentation…but this video was by far the fastest way for things to finally start clicking for me.
I especially like that you’re learning toward a goal (building a 2D game) and not passively watching someone click around on a screen.
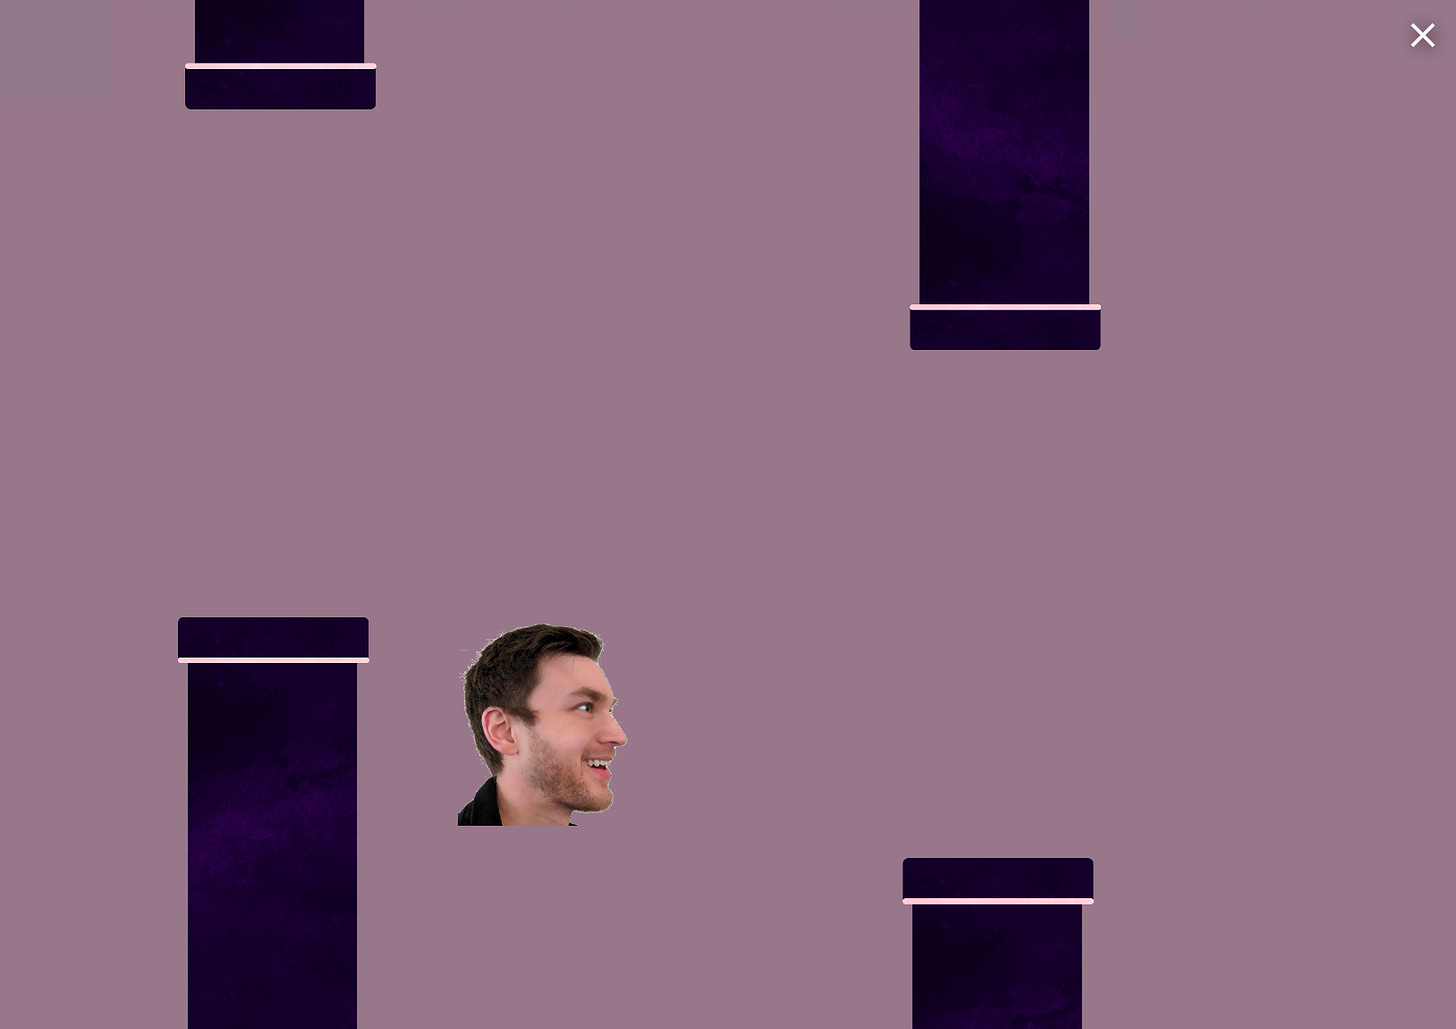
There’s even room to customize the game at the end depending on how far you want to go. For example, I replaced the bird with a picture of my face (because…reasons) and triggered a “game over” when my face went above or below the pipes.

By the end, you’ll still have a ways to go with Unity concepts…but you should feel a lot more comfortable with the editor, Unity-related terms, and the general flow of Unity development.
Quick Tip:

If you usually use VSCode instead of Visual Studio, you may want to give Visual Studio a shot first. That's the default IDE for Unity development and has a lot of built-in features that you'll have to manually setup with VSCode.

If you're stubborn like me though, you can use this guide to start getting VSCode setup, although you may run into some hiccups like I did.
Take Your First Step Toward AR
Ok so now you have Unity setup and understand some of the Unity basics. Time to get your first taste of AR before we dive deeper in a future post.
Most of the AR-related YouTube videos and docs I went through seemed incomplete, outdated, or just clicked around without explaining things.
So let’s start by doing a simple spinning AR cube on your phone.
This is like the “Hello, World!” of AR.
Before we get into it, there is one thing I need to explain.
There are several different types of AR, two of which are marker-based AR and markerless AR.
Marker-based AR is a fancy way of saying that a 3D object appears when a certain 2D image is detected by the device (in this case, by your phone).
It’s based on computer vision (a field of machine learning allowing devices to recognize parts of the real world) and can be used to augment things like paintings or business cards with additional information.
Markerless AR is when a 3D object appears at a certain location without needing to be tied to a 2D image. It can appear floating in the air or attached to the ground. And it doesn’t move when your camera moves.
This is also based on computer vision. Luckily, Unity has a lot of the computer vision stuff built in through something called ARFoundation!1
The spinning AR cube we’ll make here is considered markerless AR, since it’ll be floating in the air.2
Follow these steps:
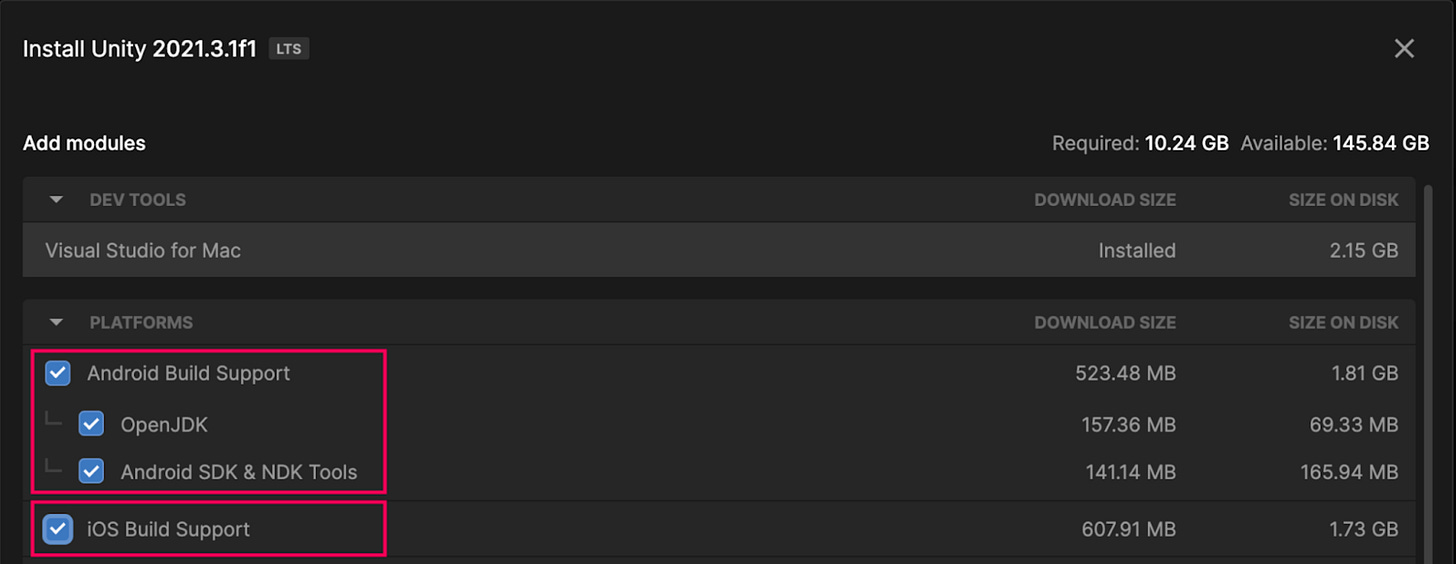
Add some mobile-specific modules to your Unity Editor installation. Go to Unity Hub → the Unity Editor you installed → click the cog icon on the right → click “Add modules” → select the Build Support module(s) based on which type of phone you have (or both if you want)
A module adds functionality to Unity. Only install the modules you need since this will impact your final project build size.
Go through the first 7 sections of this Unity Learn lesson, skipping section 5. Instead of step 6 (it’s outdated), create a new Unity project and choose the `AR` template.
In the new project, go to File → New Scene → choose the “Basic” scene.
You could use the original scene that’s already set up, but you wouldn’t learn as much :) So we’ll start a little further back.Create your AR game objects:
Right click in the Hierarchy window → XR → create an AR session origin.
Right click in the Hierarchy window → XR → create an AR session.
Right click in the Hierarchy window → 3D Object → create a cube.
Right click the “Main camera” and delete it. There can only be one camera per scene.
Save your project: cmd/ctrl + S → save in the “Scenes” folder of “Assets”.
Read through section 9 of the same Unity Learn lesson for a good overview of what each of the game objects you made are.
Update your cube:
Click on the cube game object in the Hierarchy window → change the position Z value to a 5.
We want to actually see the cube, so changing this moves the cube from on top of us to in front of us.Add a script to the cube that makes it rotate. Something like:
public class RotateCube : MonoBehaviour{public float speed = 150f;void Start(){}void Update()
{
transform.Rotate(Vector3.one, speed * Time.deltaTime);
}
}
Press play and see your rotating cube! It’s not on your phone though so technically I’m not sure if this is AR yet…let’s fix that!
There’re a lot of nuances depending on the phone you have, so I’ll direct you to https://learn.unity.com/tutorial/deploy-your-project-to-ios-or-android.
You created AR!
Your Next Steps
I hereby dub you leveled up.
At this point, it’s all about knowing your context. What do you need to learn next to build your idea? What outcome do you want to build towards?
Then use YouTube, Unity Learn, and Google and learn what you need to build it.
Or even better, reply or add to the comments here what you’re looking to build and I’ll do what I can to help you get there.
Best,
Matt
Let me know what you think of the content, style, or any ideas you have for future posts…I’m here for you!
As always, if you’re not subscribed yet, you can do that here:
AR Foundation is the glue between Unity and different device’s AR SDKs (ARCore for Android and ARKit for iOS). So you can create a project once and build the AR experience for both Android and iOS: https://docs.unity3d.com/Packages/com.unity.xr.arfoundation@5.0/manual/index.html
Don’t worry, we’ll dive into more specifics in a future post. Let me know if you have any specific questions in the comments below or as a response to the email though.


